Remote access Home Assistant from your phone when using using DuckDns and WireGuard and when not at home. This post is using a Linux set-up. Debian Bookworm with Home Assistant Supervisor and a Android telephone with the Home Assistant companion app
I’ve been playing with Home Assistant for a while now now, with the idea of replacing, Tuya, X-Sense and other apps that I use to control my smart appliances with just one program. I’m pleased with these apps, but if I can get them all under one roof, so much the better.
Remote access Home Assistant from your phone, Linux & Android.
Home Assistant supervisor was installed. Firstly on a RaspberryPi4 that I had hanging around and that I used it to play / test different versions of Linux.
After many different tries I ran Debian Bookworm, with Docker, Mosquitoo & Zigbee2mqtt. (Using a Sonoff Zigbee USB dongle)
Although everything worked, the system came to a grinding halt as I only had 2 gigs of memory on the raspberry.
So I ended up buying a Lenovo reconditioned Tiny PC, with an SSD and 8 gigs of memory. Now all runs perfectly without running out of memory. My only regret is I don’t like Debian, but trying to get all the above mentioned running in Arch (my preferred Linux, was too much hassle) . Anyway I only use this for Home Assistant so I’n not often on it.
Lenovo done. Debian Bookworm, Docker, Mosquitoo & Zigbee2mqtt installed. Home Assistant installed and working, plus access to Home Assistant by my Android téléphone with the Home Assistant companion app
https://play.google.com/store/apps/details?id=io.homeassistant.companion.android
when at home using the same Wi-Fi. I now wanted to access HA by my phone but when not at home. Hence this post, as it’s not as easy as it seems.
I started Googling around, every post seemed to pick the solution Duck DNS It seemed easy enough. But I could never get my phone to remote access Home Assistant with just Duckdns. No matter what I tried.
Why WireGuard ?
Well I couldn’t get DuckDns remote access to work on it’s own. So I did this DuckDns & WireGuard
Create an account with www.duckdns.org (as you will need it with WireGuard)
You then need to create / choose your Domain Name by entering it where is says sub domain, this can be anything, ‘myduck’, ‘duckforme’, ‘meandmrsjones’ You can do this using any computer, not necessarily your RaspberryPi or in my case the Lenovo. I have my main Arch computer running, next to the Lenovo, with bigger screens, so I used that.
DuckDns

Then click on add domain. This will then generate your Token and your current IP that you all will need later, copy these details somewhere as writing the Token it is a pain as it’s long. Later you will also need to copy ‘keys’ for WireGuard, so it’s a good idea to have a program that you can access on all your computers and phone (Google drive, NextCloud, Email etc)
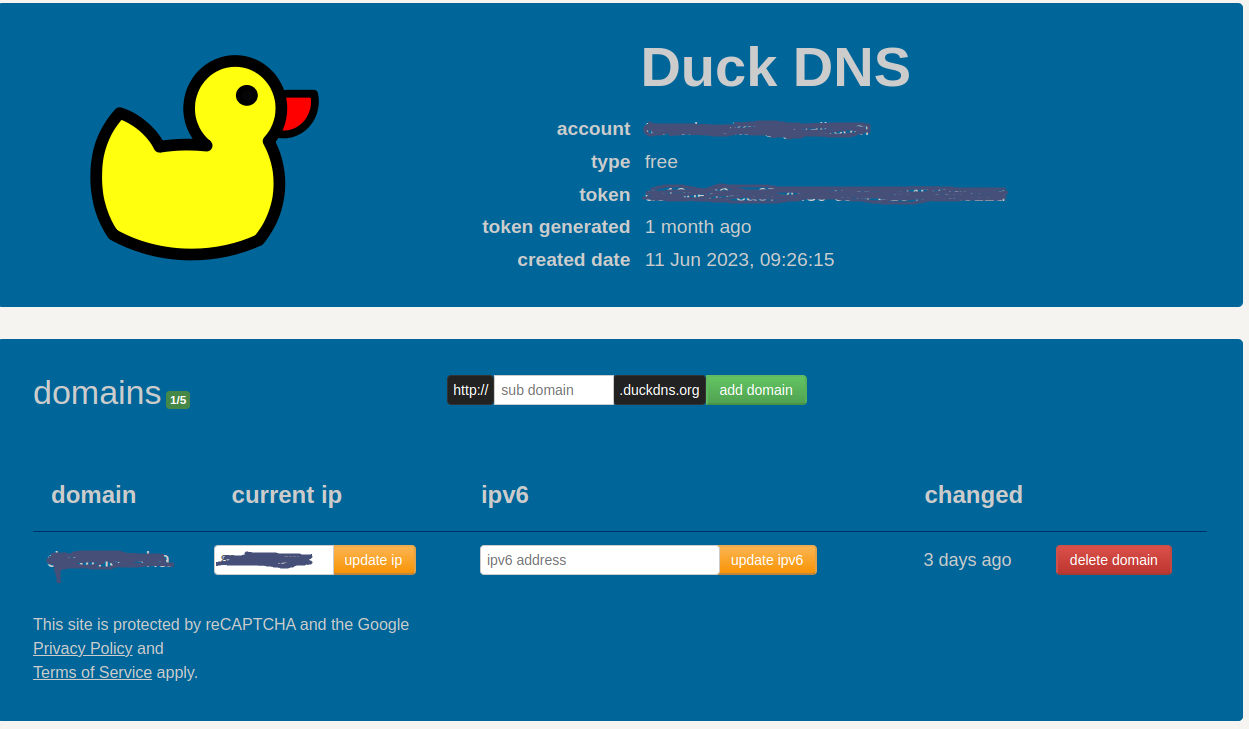
So now you should have a page like mine. So Far, So Good 🙂
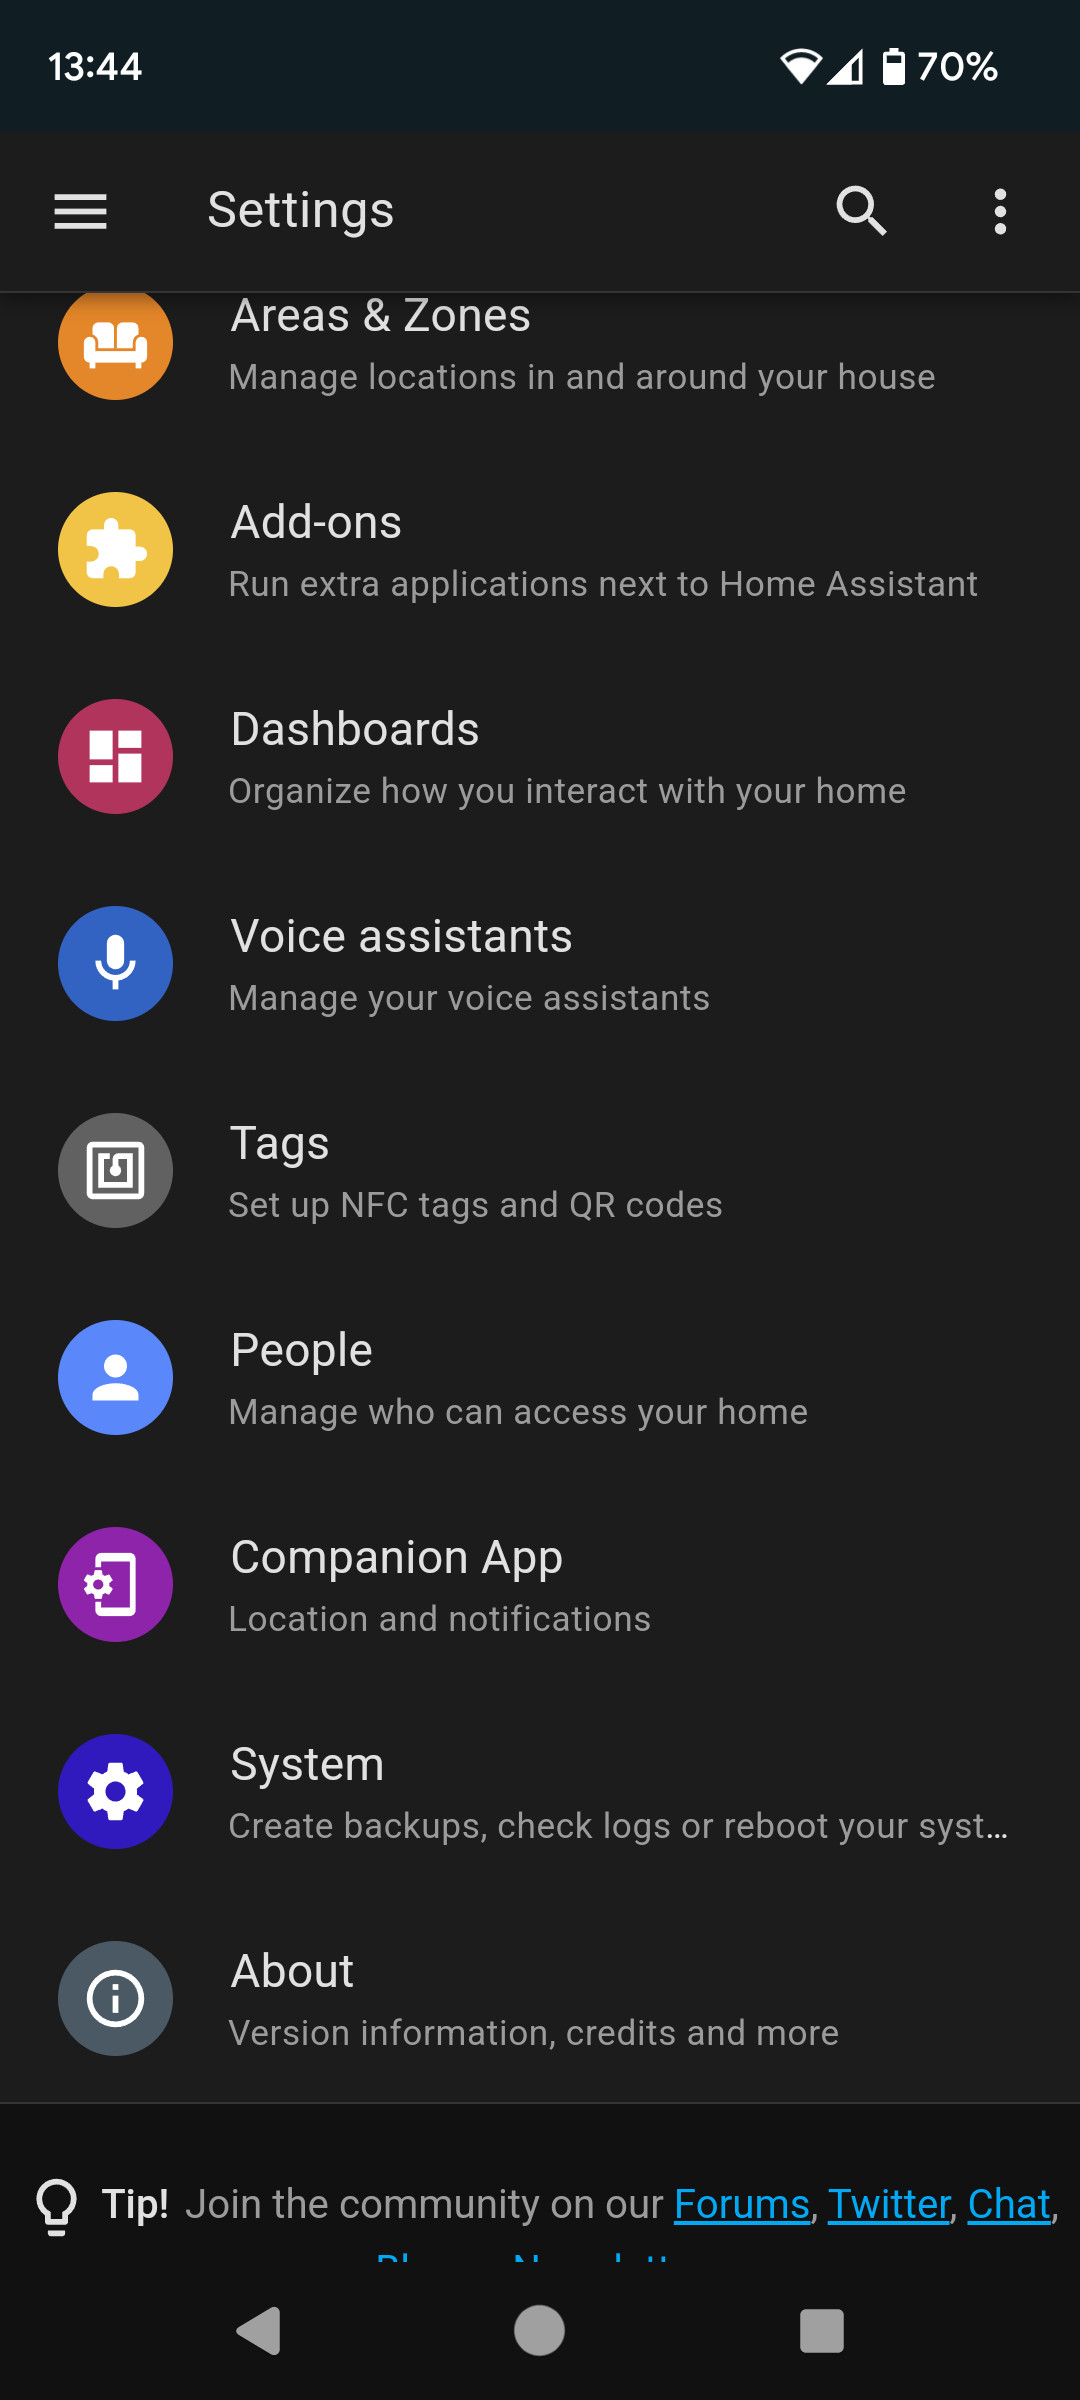
Now . Time to go back and play with Home Assistant, which I’m presuming you have already installed, in my case I installed the supervisor version, so that I can use the ‘add-ons‘ as you will need these
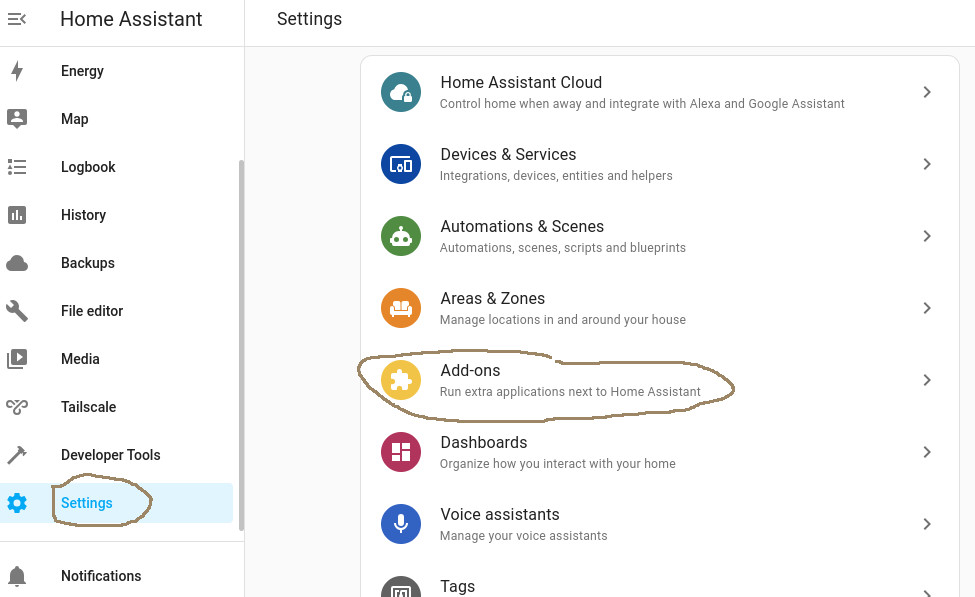
Once you have clicked on the Add-Ons, click on the blue button Add-On-Store bottom right hand and at the top of the following page type in WireGuard and Install it
Why WireGuard. Well as I said earlier, I couldn’t get DuckDns access to work on it’s own. And I had tried many times, it just wouldn’t connect from the Home Assistant companion App on the phone. Reading up on the forums, there were posts every where with this problem, with multiple solutions, most years old, and most that never worked. So I was about to give up when I came across and article using WireGuard and DusckDns.
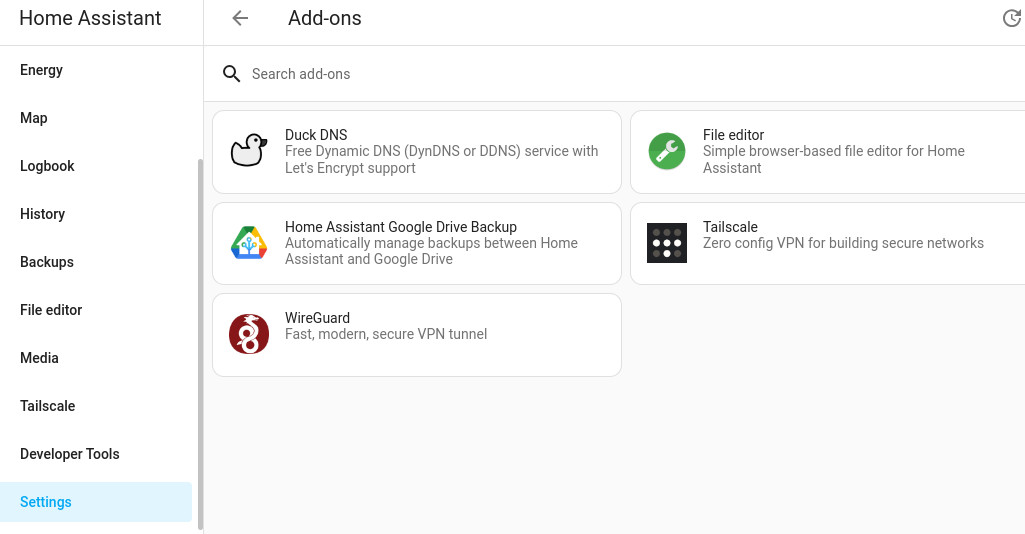
Okay, you installed WireGuard and should now see it on your Add-On page like mine. I have a couple more add-ons installed, DuckDNS (but it’s not active, it’s greyed out) File Editor, Google Drive Backup and TailScale (another way to remote access your PC from the phone while away.
WireGuard configuration on Home Assistant
So let’s now get WG up and running, clicking on the WireGuard, it will open a new window for you and at the top of the page, you will see : Configuration, Log
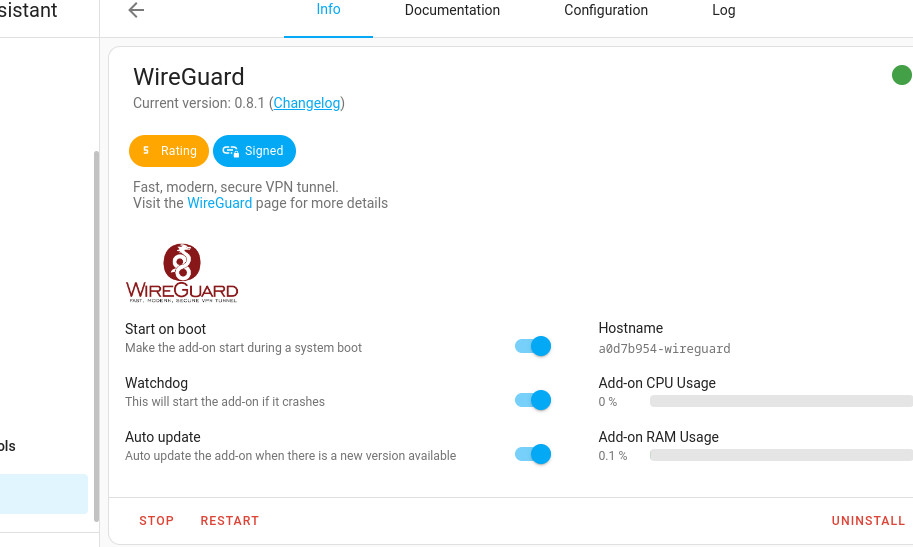
Click on Configuration at the top of the page
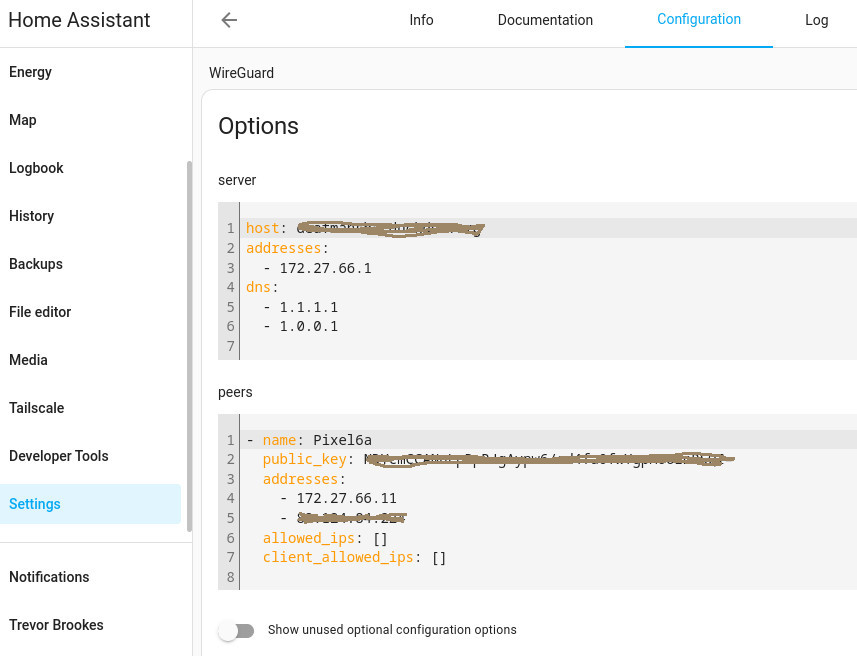
Now, basically just copy my settings. Changing host:, name:, public_key: and the second IP in adresses: for your own.
Host: Type in the DomainName that you had chosen on DuckDns web page, followed by .duckdns.org (so if you had chosen duckforme, then it would be duckforme.duckdns.org
server
addresses
– 172.27.66.1
dns
– 1.1.1.1
– 1.0.0.1
Be careful. Home Assistant needs the spaces and the hyphens to be perfect. Otherwise you cannot save the page
peers
In the Peers section, give a name, you can see that my Phone is a Pixel6a. You can type in whatever you want.
The Public Key, we’ll come back to that later. See below setting up Android WireGuard
Adresses:
– 172.27.66.11 (note 11 and not 1 as above)
– xx.xx.xx.xx this you input the ‘current ip’ that was given to you on the Dusckdns web page.
When all this is done, click on the button, SAVE, bottom right of the Home Assistant page; Don’t Start it yet (button bottom left)
WireGuard configuration on your Android Phone
Now time to get WireGuard on your Android phone.
https://play.google.com/store/search?q=wireguard&c=apps
Install it
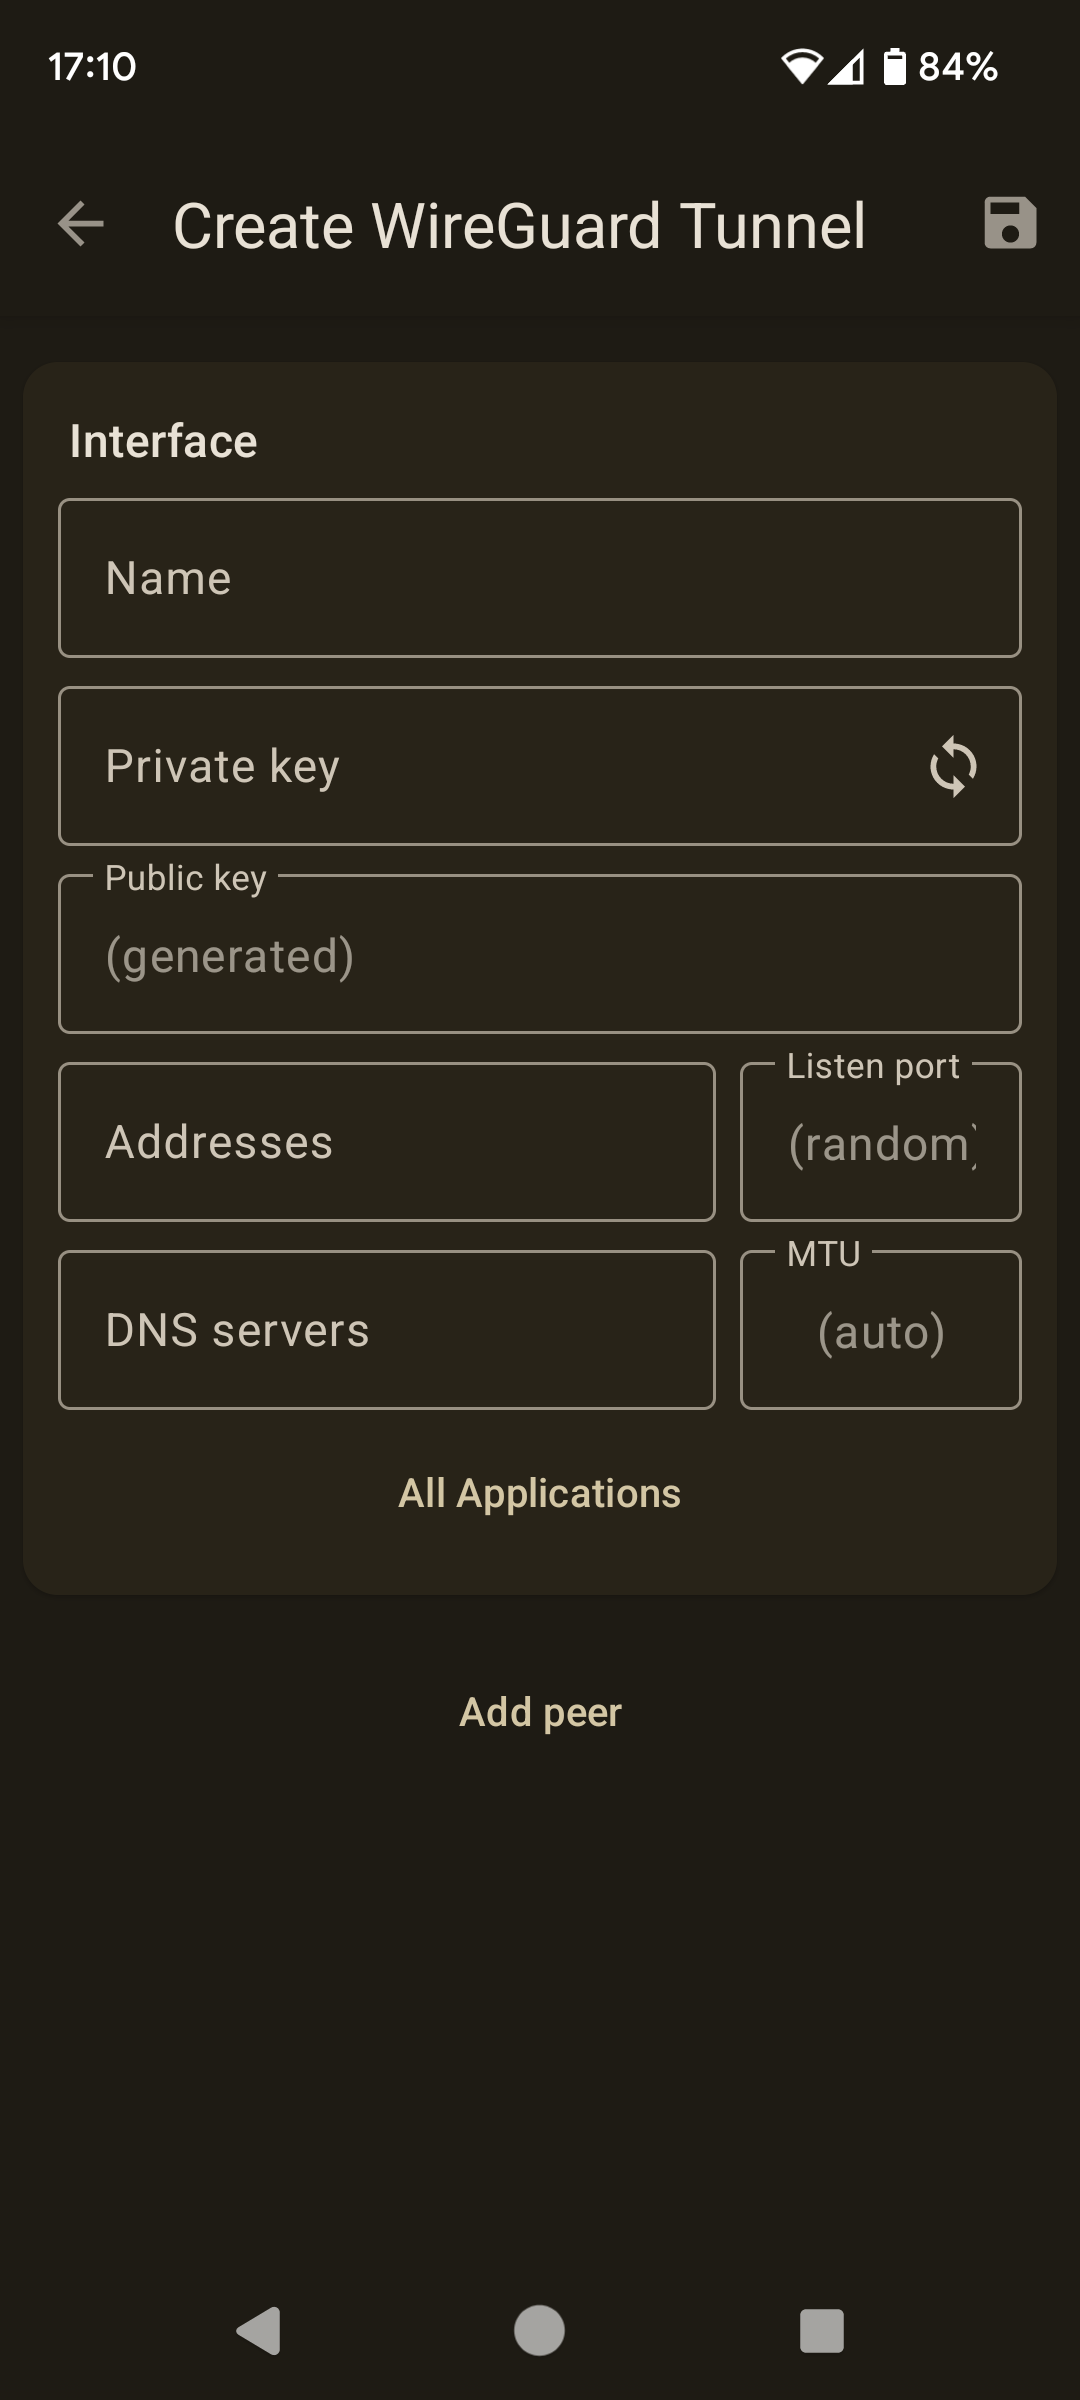
Open WireGuard on Android and click on the + button bottom right and choose, Create from Scratch:
Configuration Android
Interface Section
Enter a name, whatever you like. Mine is HA Home_1
Private key (click on the circular arrows icons to generate it)
Now copy the Public Key (this was generated by the private key creation) as this you will need to add it to finish the Configuration / WireGuard on the Home Assistant. See above ‘image WireGuard Page’ (copy this to a file that you can access on the Debian PC (google Drive, NextCloud, email….) rather than having to write it down.
Fill in :
Adresses 172.27.66.11/24
DNS servers 1. 1. 1. 1,1.0.0.1 (note the comma in the middle)
Now go back to Home Assistant on your PC / settings / WireGuard / Configuration and add the Public key in the Peers section (See above image)
Once your Public Key has been added to the config page, SAVE. You can now START it. (If ever Home Assistant won’t let you save it, check the, spaces, hyphens as you probably have a space too many….)
Now click on Log, (top right) click on refresh until you see the Interface option with the public key. That would be the public key for the server itself. So note this rather long key and go back to your Android phone and in the bottom section peer of the Create WireGuard tunnel. Fill in the Public key that you just copied from Home Assistant logs.
Peer section
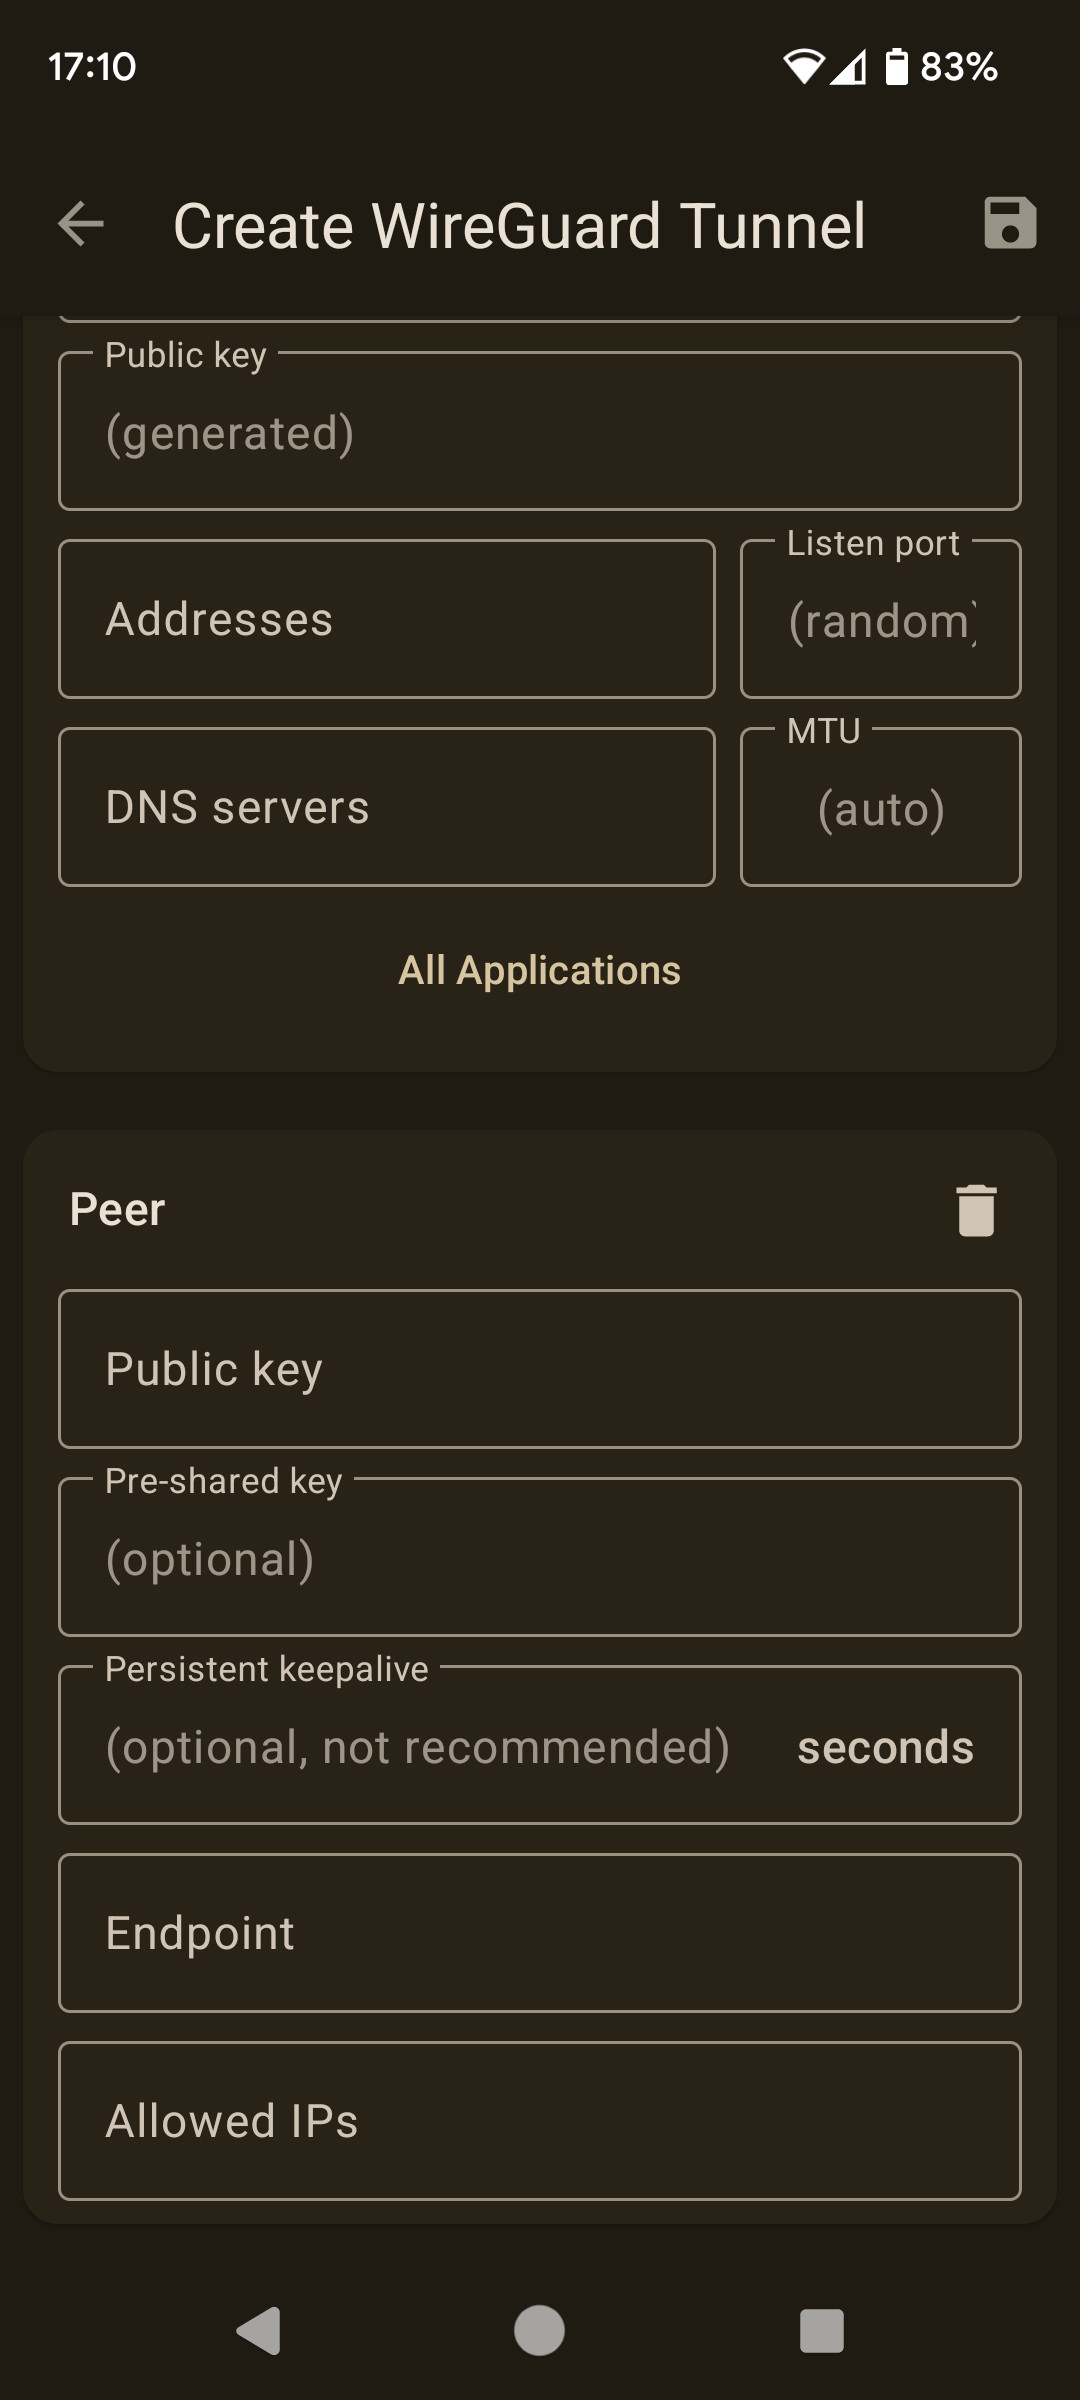
Fill in
Persistent keepalive : 25
Endpoint: your duckforme.duckdns.org:51820 (or whatever you name you created adding :51820 at the end)
AllowedIPs : 0.0.0.0/0 (these are zeros)
Now you can save this page. Icon top right (you can always modify / correct if need be by clicking on the pencil, top right
SSL
One last thing, Now this took me a while to suss out when spending time to try and get DuckDns to work on it’s own. And I believe it’s the same problem for WireGuard.
WireGuard creates a folder named wireguard and in it is a file named private_key and a folder named the same as you typed in Peers in HA config section (in my case Pixel6a) with some other files in it.
Now all sites state that these folders and files are stocked at /ssl/ on your Linux PC. Mine were not. They are in /usr/share/hassio/ssl so what I did is create a /ssh/ folder (as this didn’t exist on my Debian Set-up) and copied the wireguard folder to /ssl/ so I now have it twice in two different places. I haven’t tested and can’t be bothered to see which one is used. For info the files are ‘locked’ by Linux, normal, so you need to copy with root privileges.
We have nearly finished Remote access Home Assistant from your phone
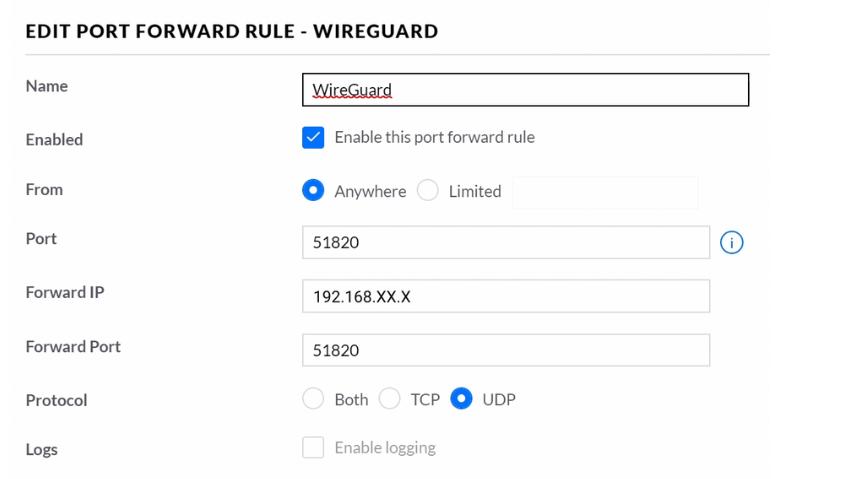
On your router, you need to set up a port forward rule for WireGuard
So you need now to create a port forwarding rule in your router. Open the router’s settings and locate the Port forwarding configuration. Of course each routeur is different, just for fun…..
Add a new rule and if need be, set the name to WireGuard. The incoming port set it to 51820. For the forwarding IP, set it to your Home Assistant IP address, the forwarding port to 51820, and the Protocol set it to UDP
This is my Rule using an Orange Box as I’m in France

Note that the Orange Box above gives me a name under Equipment rather than my Debian IP that is 192.xxx.x.xx
This is for a more standard routeur.
Notice that might need your IP than the name of your Home Assistant PC. where as my French Routeur shows me than name rather than the IP
This is a very good web page explaining WireGuard setting up, probably far better than I have done. I used this to help me set up my original WireGuard setup.
https://www.juanmtech.com/how-to-set-up-a-secure-vpn-with-wireguard-and-home-assistant/
Remote access Home Assistant from your phone
So here we are. To test and while still at home. Turn off the Wi-Fi on your phone. Now the Home Assistant companion App won’t connect.
Open WireGuard on your phone and activate it / switch it on.
Go back to Home Assistant’s app.
Now when you try and connect it should work as it uses the same adresse.
Mine is 192.168.1.40:8123 which is the IP of my Lenovo PC and so Home Assistant’s login.
If all is done correctly you will now connect to Home Assistant Home without Wi-Fi and of course this will works even miles away from home.
Astuce
I find sometimes that Home Assistant companion app, can block when switching from Wi-Fi access to WireGuard. So I created a second server access. It doesn’t really change anything,as it’s exactly the same settings as my original access, except I feel that it accesses Home Assistant quicker, probably just due to changing from one to another.
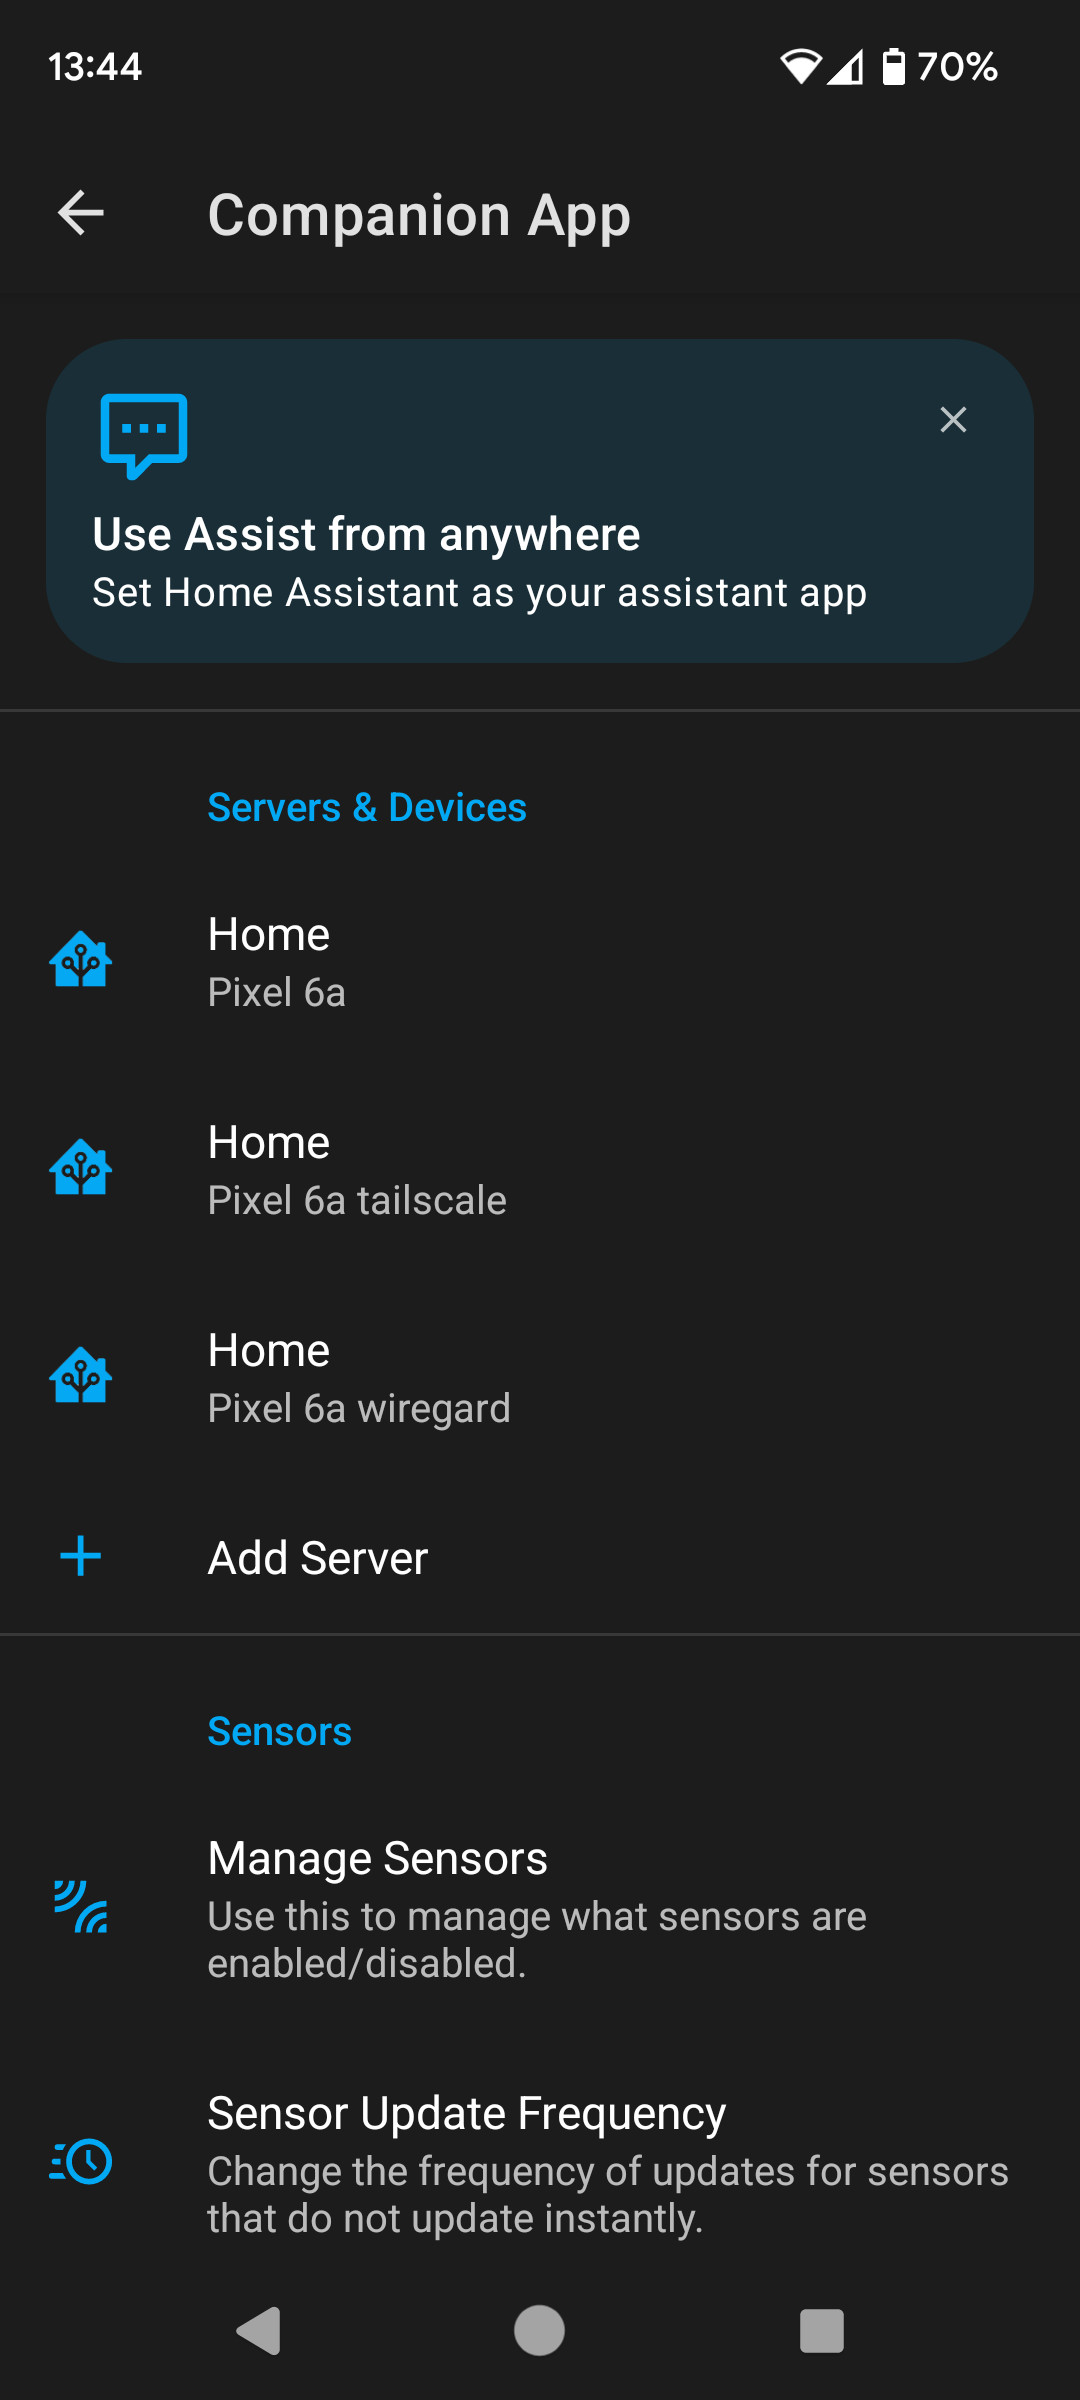
I choose Companion App in the settings & then choose ‘Pixel 6A WireGuard’ that I created even though it’s exactly the same settings as ‘Pixel 6a‘
Linux Firewall
If you are running a Firewall on your Linux PC, (gufw for XFCE like me) you will need to create a rule for the ports 8123 & 51820