UPDATE 2026 – I have rewritten this post, shorter and easier to read Here
Updating the Bios on a Zotac computer running Linux
Having just bought a Zotac EI730 to be my home media center. And after installing KodiBuntu (Linux + Kodi media center software) on it. I wanted to update the bios as there was a later version available on the Zotac site
From the Zotac site you can easily check and download the latest bios version
https://www.zotac.com/fr/files/download/by_product?p_nid=340009&driver_type=238&os=All
Sadly the bios on Zotac doesn’t allow an update by itself. (telling the bios to update itself from a certain file)
If you are like me and am running Linux and like me know next to nothing about linux then updating the bios via Linux OS is quite difficult
So I ran a couple of Google checks and found next to nothing on how to update. with many people asking this question. Not running Windows. How do I update my bios. ???????
Reading at the PDF that is supplied with bios download from Zotac tells you how to get around this problem. But it’s as clear as mud and is slightly wrong.
So I thought I’d try to explain making hopefully things more clear. So here’s how.
Update 2025 : better late than never. I have included how to update the Bios also using Linux
Making a USB DOS key
Firstly you need to create a DOS bootable USB , you can do this from here https://rufus.ie/en/# I already had this on a USB key in a cupboard so didn’t need to re install it. For info Rufus needs Windows.
Once this Boot USB is done by Rufus. Download the correct bios file for your Zotac and just unzip and drop all the files onto the USB. My file contained (at the time of writing this post)
If you are using Linux, make an usb key dos bootable. I used LiteUSB from Freedos https://www.freedos.org/download/ Download the LiteUSB and uncompress the folder, in the folder there will be three files, you need the xx.img file.
Then in terminal run sudo dd if=FD14LITE.img of=/dev/sdX bs=4M status=progress && sync (at the time of writing the version was FD14LITE.img) also change the /dev/sdX to your correct path (otherwise you could screw up your PC, been there, done that…)
Ok that’s the bootable dos USB made, now to copy the bios files to it.
Always in terminal, lsblk to double check your path. Then sudo mount /dev/sdX1 /mnt (again change the X to the correct letter). Now sudo cp /home/trevor/Downloads/pb225_730/* /mnt (as you can see mine was in the folder previously downloaded and uncompressed in my Downloads folder) then run sync
sudo umount /mnt
When starting the Zotac from the dos USB, choose the dos option which will drop you into the black screen with c: (see below Here we go). It’s easy and works
The Bios Files
AFU303.exe
afuwin.exe
amifldrv32.sys
amifldrv64.sys
B2250723.bin
Note.txt
update.bat
Important_note_AMI_EFI_2.02.pdf
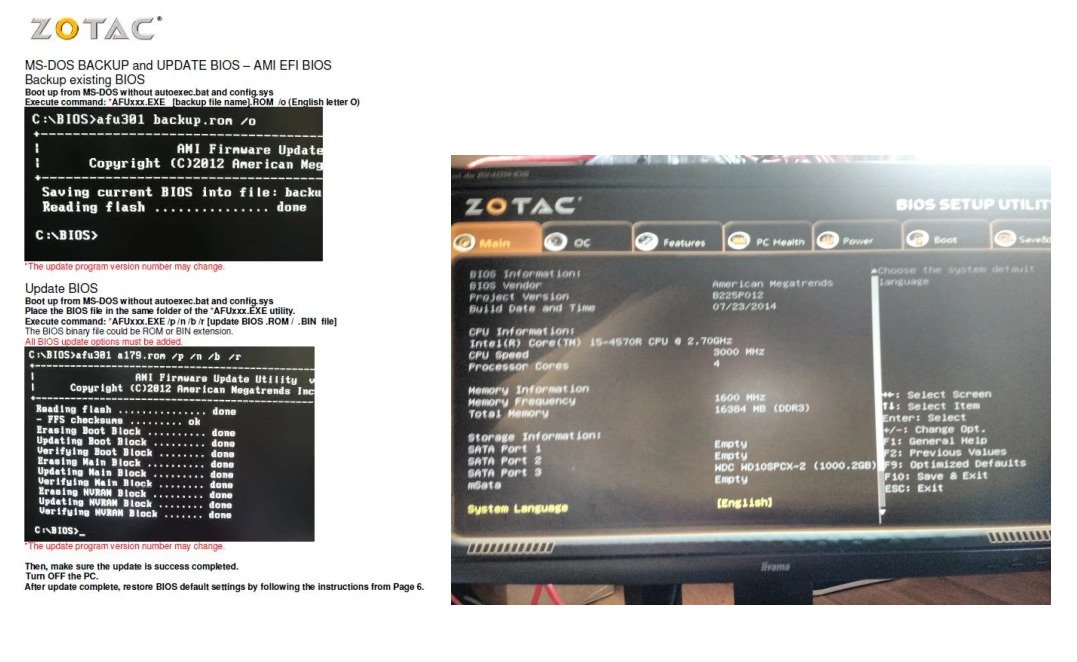
Reading the PDF from Zotac (the last page) firstly it states ‘Boot up from MS-DOS without autoexec.bat and config.sys’ but there are no files named like this. So except the PDF file which I knew that I didn’t need I just dropped all the other onto the USB, (only two of all these names will be needed to be typed into the following DOS screen when you boot up later)
Once all files are copied onto the USB just boot the Zotac with USB plugged in. Keep on pressing on the F8 at boot (this could be a different Fx depending on the model) you should then have a screen with a choice of boot options, your HD, USB etc so just choose the USB using you keyboard arrows to select it.
All being well after the boot you should now have a black screen with some white writing similar to the below PDF and screen shot
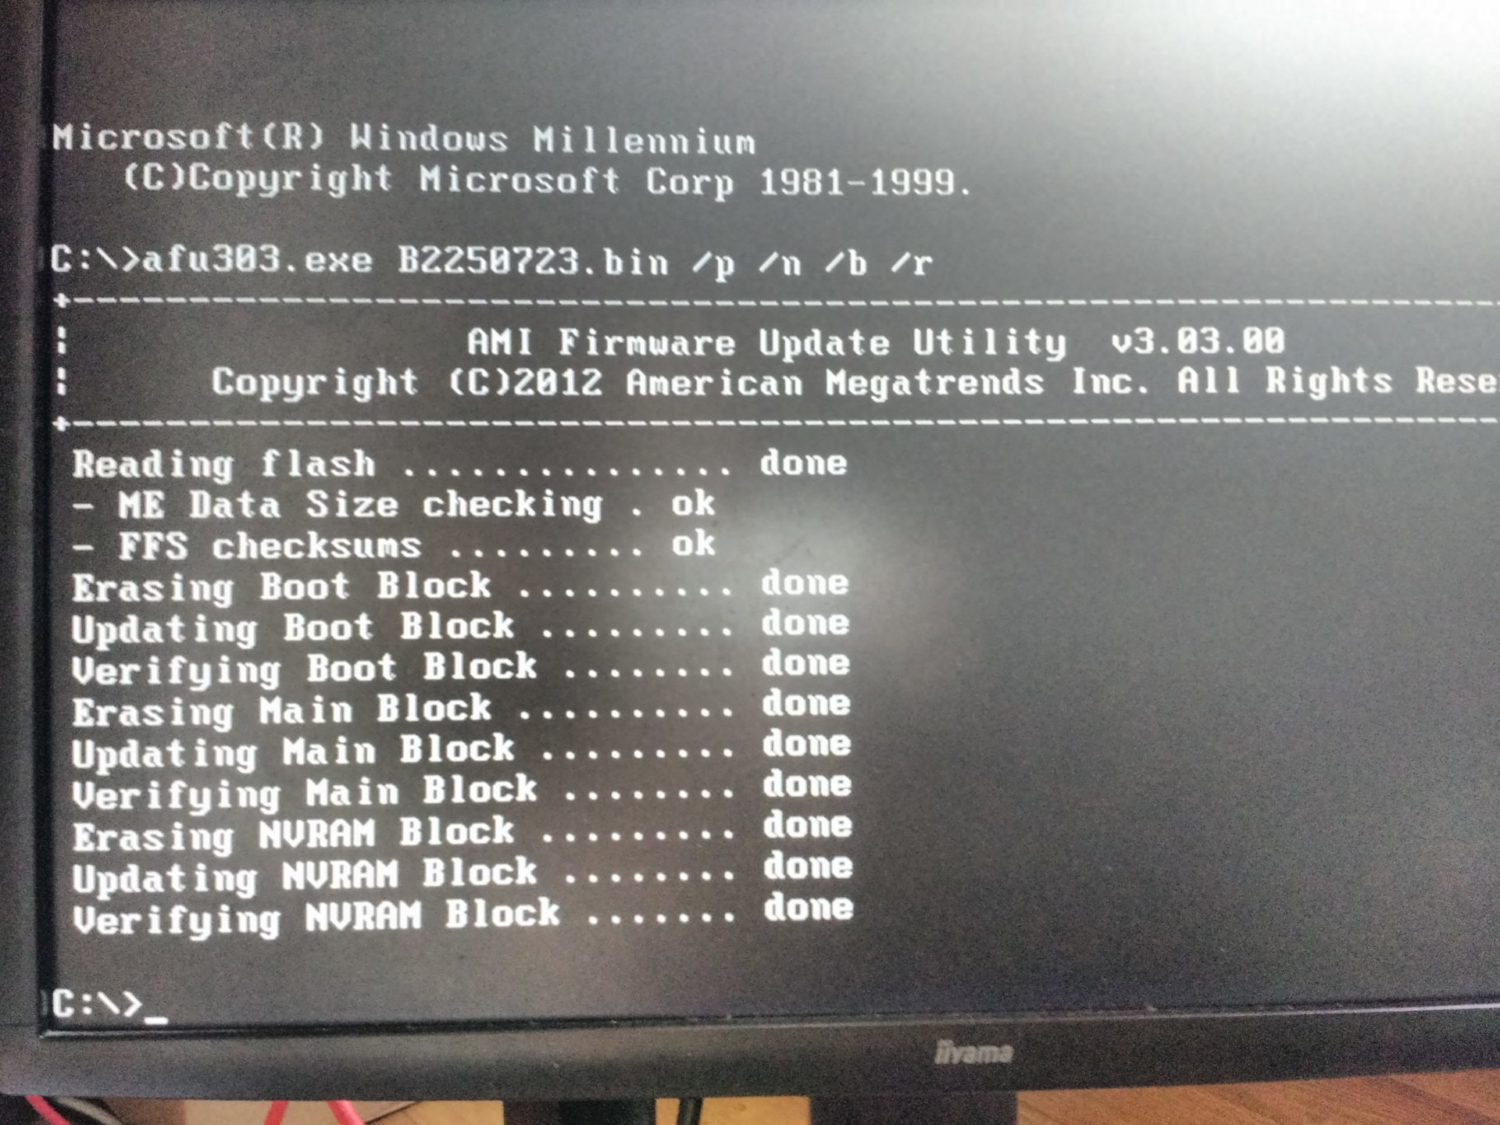
After the C:\> you will now need to type the following. Please use my screen shot as the example and not the Zotac PDF as it’s not right
So here we go
1 : C:\>afu303.exe (if yours is not quite the same, you type exactly the same name as what you copied onto the USB, probably only the number will change) Don’t hit Enter yet.
2 : C:\>afu303.exe B2250723.bin (again exactly the same as the name of the file copied on your USB. Again the number can change depending on the version) Don’t hit Enter yet.
3: C:\>afu303.exe B2250723.bin /p /n /b /r (note there is a space before each /). Now if your are sure that you have typed that two file names correctly Now hit ENTER and pray ….. (I always pray when updating a bios, because if it goes wrong. Power cut for instance, you are in the shit …)
You can see in my screen shot how I typed it all in. There is a space between the file names and before each slash and you should have the ‘done’ at the end of each line and an empty C:\
You can now turn of the Zotac, unplug your USB and restart.
All good, you’ve now got the latest Bios
When you reboot, if you boot into the bios (delete or supp button) you should see that your bios has changed, mine was B225P011 and it went to B225P012.
To make things difficult Zotac doesn’t use the same names in the bios and on their site. Mine on the site was B2250723.bin and on their bios its B22P012 , making it hard to really know if the bios installed and on their site is the same or newer. Why make things difficult ……
Notice that on the Zotac PDF they explain one way and show you another, most confusing
So there you go Updating the Bios on a Zotac computer running Linux isn’t that hard. I Hope this all helps. Also living in France for so long I forget my English so forgive any phrases / words that aren’t quite right. So please do not hesitate to leave a reply or ask a question.
PS : on the Zotac PDF it suggests that you backup your old rom first, although I didn’t bother doing this. It might be wise.